Showing posts with label cooking. Show all posts

Wednesday, 15 April 2015

Cake Decorating

Ever since my friend and I were in year 12 together way back in 2013, we have wanted to open a bakery together. In our form group at school we made cakes for everyone's birthdays, and decorated them all individually. Looking back now, some of the cakes probably looked rather average, but you have to start somewhere right? Recently I have been getting back into using fondant to decorate my cakes and when I was over in New Zealand over easter this year my aunt taught me a whole heap of new fondant and cake-making skills.

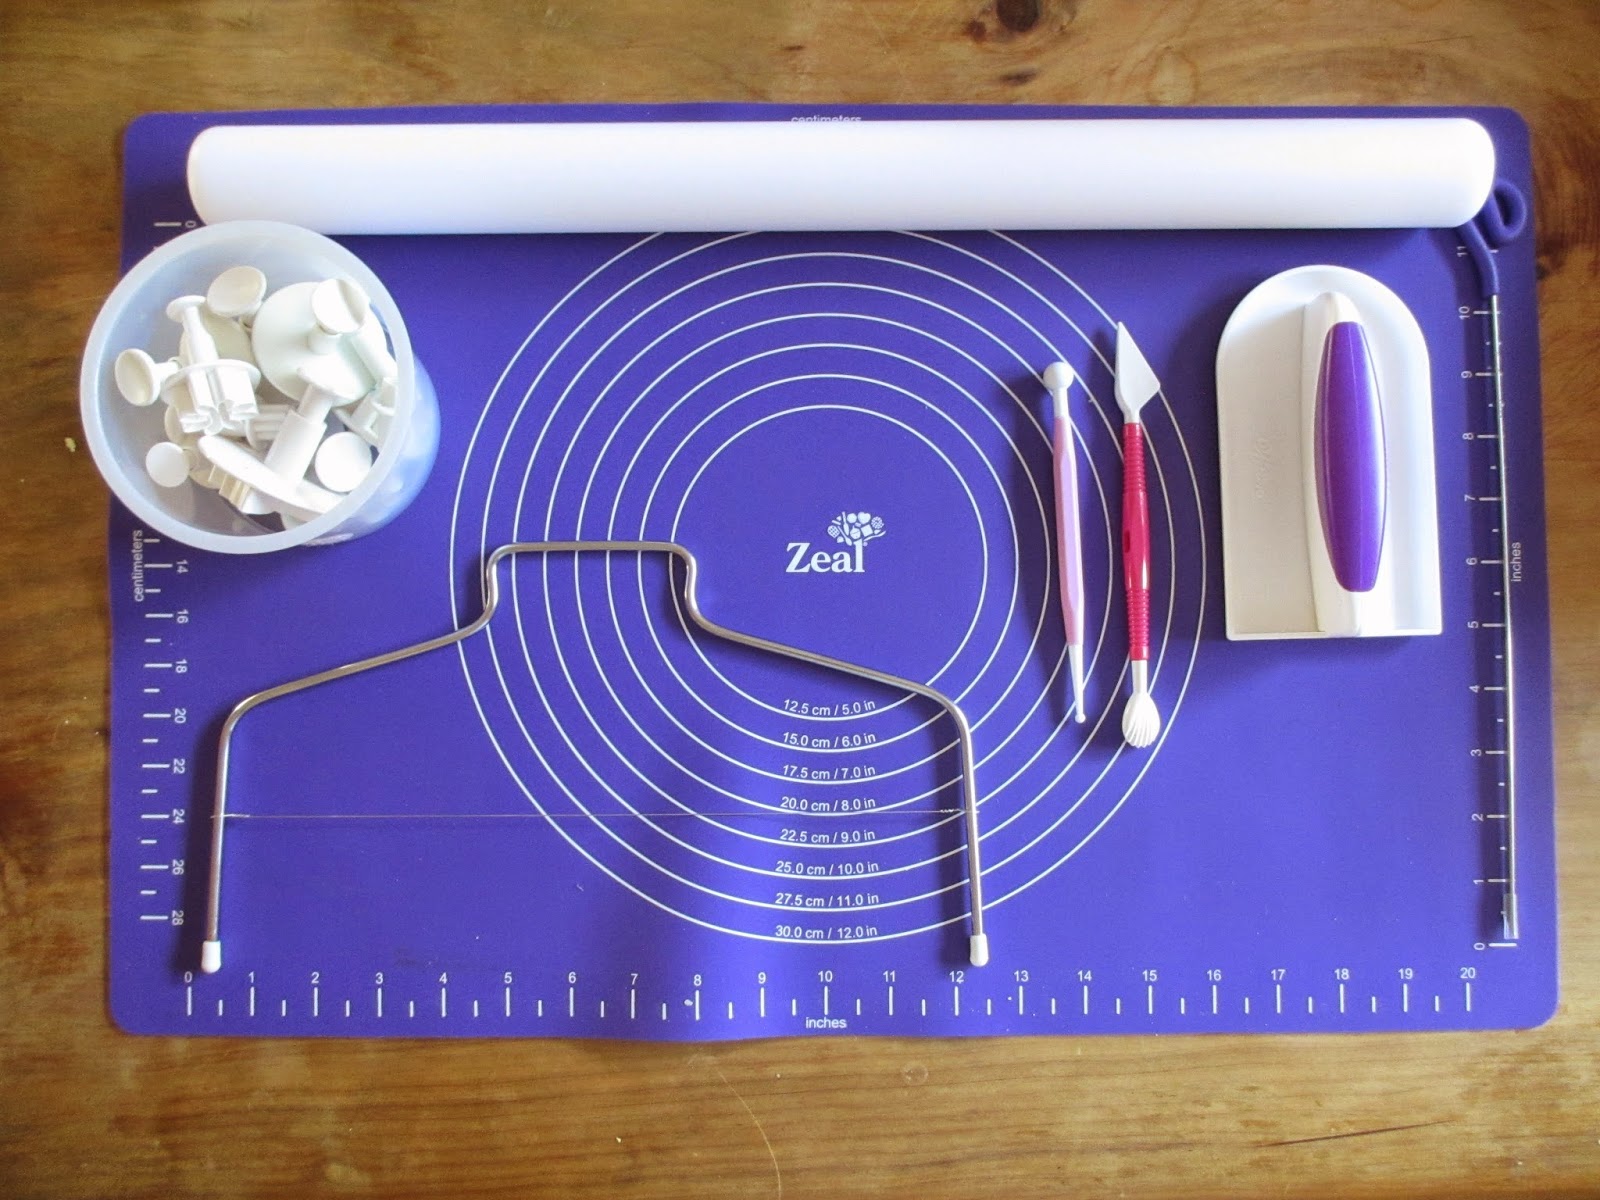
The image below is of a selection of the tools I use to decorate the fondant cakes. The rolling pin and the pink knife were presents for my mother's birthday, and everything else has been a really worthwhile investment.


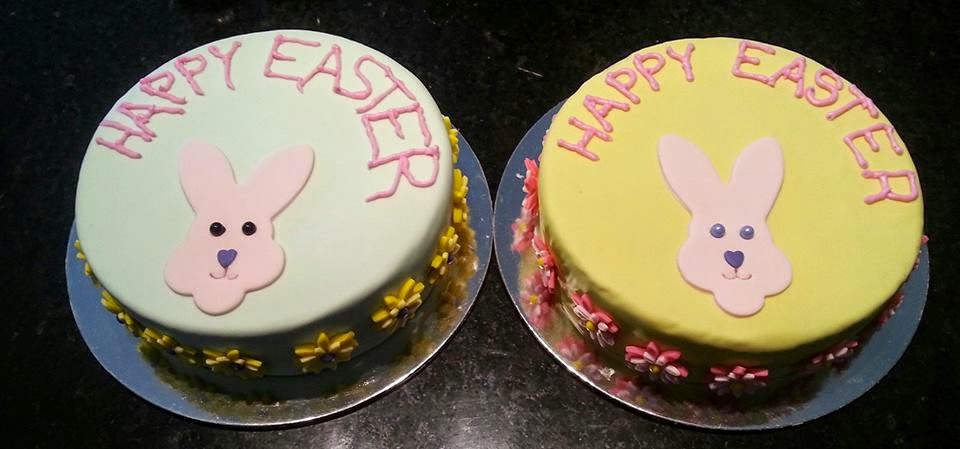
These two cakes are from when I was over with my aunt. Although I know I still need to work on my writing icing skills (the cake on the left) I'm pretty happy with how it turned out overall.

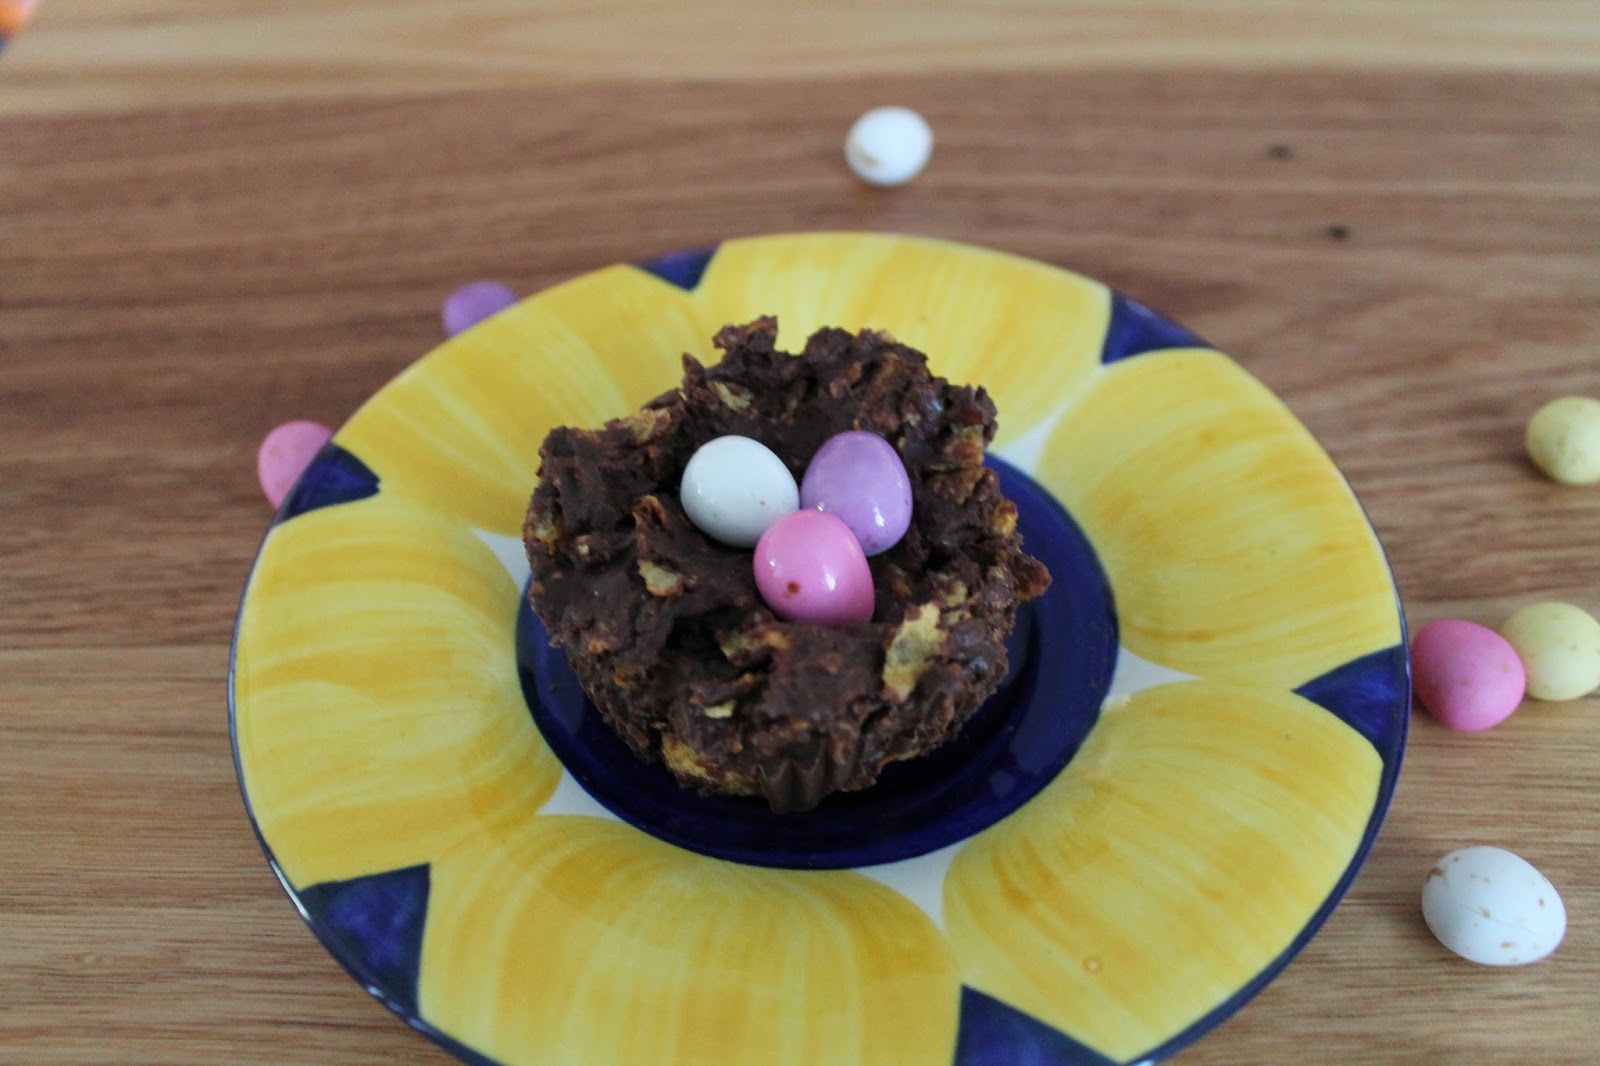
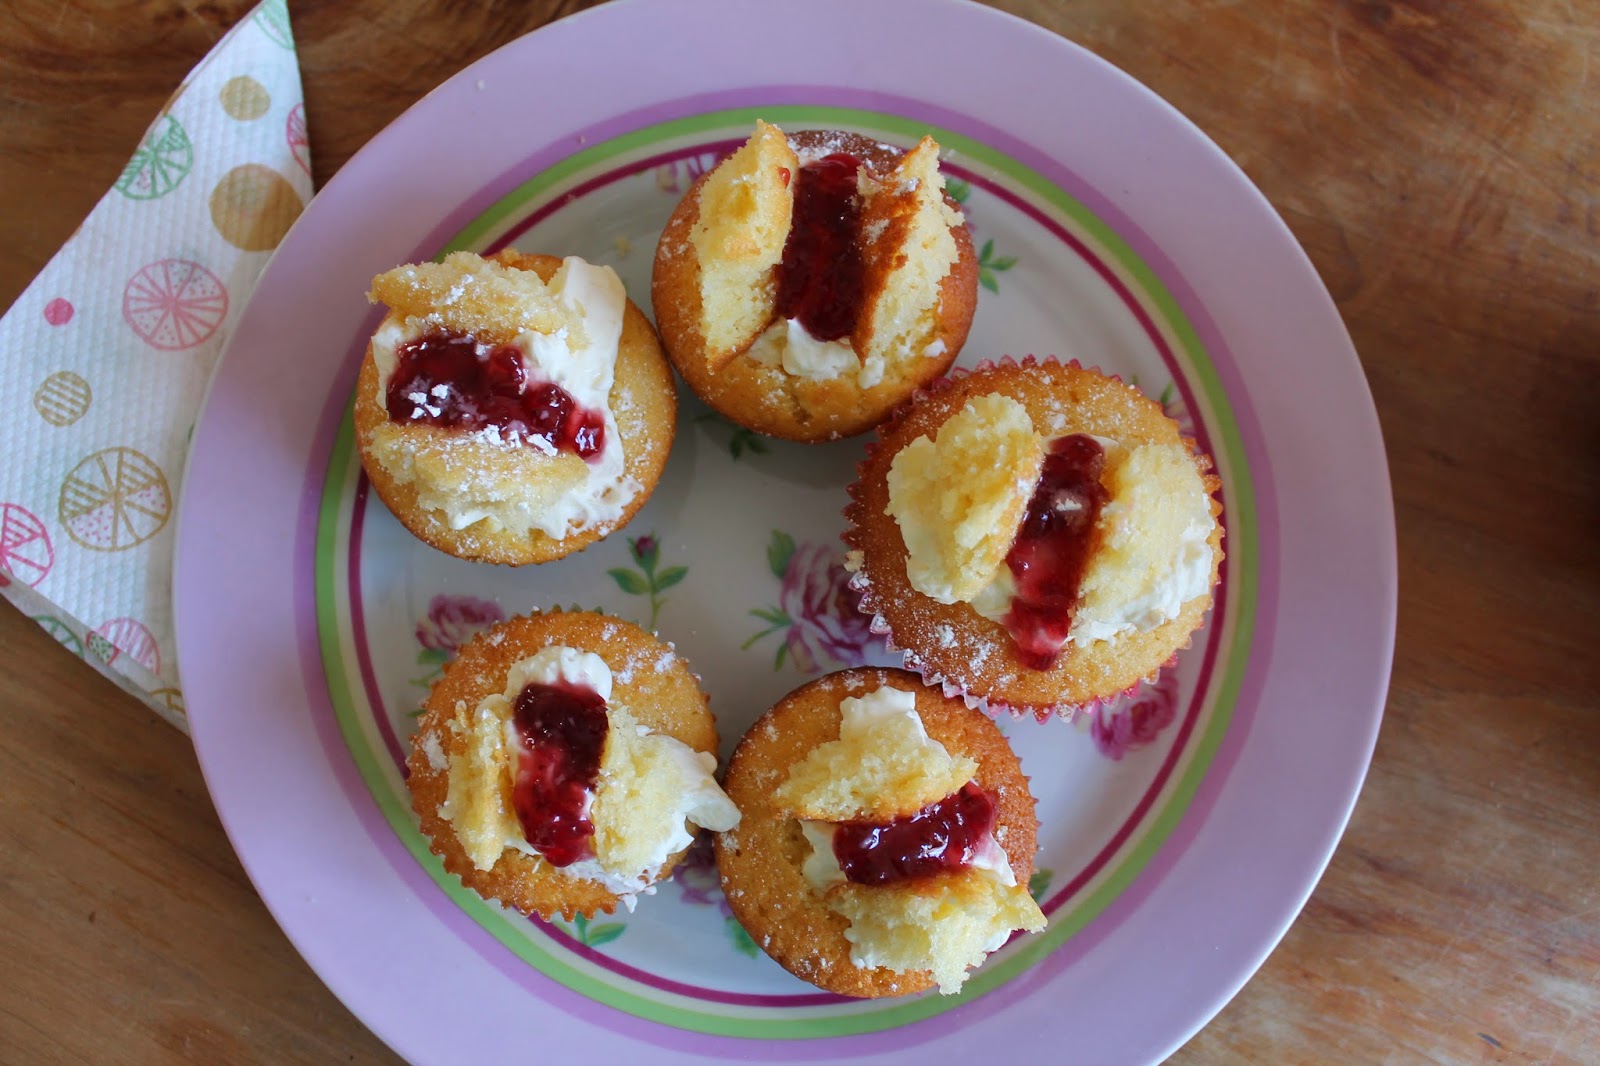
The cake below is from just after we arrived home and I was teaching my mother and sister how to decorate with fondant. We used all the tools and actually had a lot of fun.


My friend and I are hoping to keep on improving our skills in the hope that one day in amongst our music (her) and psychology (me) work that we will be able to buy some land and set up the bakery we've been dreaming of. And as corny as that all sounds, I'm really looking forward to it!

Saturday, 28 March 2015

Easter Cooking: Easter Bark

I must admit, until the end of last year I hard never heard of making 'bark' before. When I first came across it I was rather confused, and had to do some googling to find out what exactly it was, and how it's made. From my understanding, bark is traditionally a Christmas treat, but I thought it looked too good to have to wait for another year or so to make, so I decided to try whipping up an Easter themed one! I know my family certainly enjoyed it, so I hope you all do too!


Easter Bark
Ingredients
White chocolate
Mini marshmallows
Mini Easter Eggs
Sprinkles

Method
Step 1. Heat the chocolate in a microwave-safe container in the microwave in 30 second increments, stirring after each one, until the chocolate has melted. Each time your stir, mix the chocolate for a good 20 seconds to ensure that it won't burn when you put it back in. I heated my chocolate in a glass jug, and it took 90 seconds.

Step 2. Stir the mini marshmallows, mini eggs, and some of the sprinkles into the white chocolate. Pour the mixture into a tray or baking dish and place in the fridge until hardened.

Step 3. Cut the bark into edible pieces and serve and keep in the fridge when not eating.

Let me know how you find this recipe!


Monday, 16 March 2015

Easter Cooking: Chocolate Nests

The other day I was flipping through some old recipe books in the cupboard, looking for something interesting to make, and stumbled upon these little beauties. When I lived in London, these were made all the time for kids parties, and since I hadn't had the luxury of eating one in about 8 years, I scurried straight into the kitchen to get started.

This has got to be one of the simplest recipes I know, that you almost don't need an actual recipe for it. So - there's no excuse for not giving it a go!


Chocolate Nests
Taken from Usborne's Easter Cooking Book
Ingredients

  • One packet of cadbury mini eggs (I don't know if other companies make the equivalent of these)
  • 2 tablespoons of golden syrup
  • 250g melting chocolate
  • 100g cornflakes (or rice bubbles)

Method
Step 1. Melt the chocolate in a large saucepan with a little butter so it doesn't burn as easily.

Step 2. Stir in the golden syrup to the nearly-melted chocolate.

Step 3. Once the chocolate had completely melted, mix in the cornflakes.

Step 4. Place heaped spoonfuls of mixture into muffin cases, shape with your fingers, and press an indent into the middle of each nest. In the indent place 3 of the mini eggs.

Step 5. Place the muffin tray in the fridge and leave to set for about an hour.

I love this recipe simply because it is so easy, and can be quickly whipped up in an emergency. 


Enjoy!

Saturday, 14 February 2015

Farmhouse Sultana Cake Recipe


Life has been a little busy lately, so this has been the first time I've been able to do any baking in the last couple of weeks. So, with the house to myself for the day I set about flicking through recipe books, and found a few recipes I wanted to try out, this being one of them. Now, my mother has made this sultana cake for the family a few times, but I had never tried it myself. And I'm pretty happy with my first attempt at it!

Although this cake is a savoury based one, it's still delicious, and is one of the few sultana cake recipes I actually enjoy. Hopefully you will all enjoy it too!


Farmhouse Sultana Cake
Time Taken: 20 minutes +cooking time
Makes: 1 large cake, or 2 small ones

Ingredients:
  • 500g sultanas
  • water
  • 250g butter, cut into small cubes
  • 1 1/2 cups sugar
  • 2 cups flour
  • 1/4 teaspoon salt
  • 3 eggs
  • 1 teaspoon vanilla essence
  • 1 teaspoon almond essence
  • 2 teaspoons baking powder
Method:
Step 1. Put sultanas in an saucepan, cover with water and simmer for 5 minutes, then strain off water. Add the butter & sugar to the sultanas and stir well.

Step 2. In a bowl, mix together oat bran, flour, baking powder, & salt.

Step 3. Lightly beat the eggs. Then, add eggs alternately with flour mixture into the fruit.

Step 4. Add both essences to the mixture and stir. Then, pour into a cake tin lined with baking paper.

Step 5. Bake the cake at 175°C for 1 hour, then reduce the temperature to 130°C and bake for a further 30 minutes.
NB. If you're going to make two smaller cakes, cook for 15 minutes less on each of the times.

And that's about it. I particularly like this recipe because there's no icing, or topping to fiddle around with at the end, when all you do is want to try a slice. This cake tastes beautiful served either warm or cold.

Let me know what you think!


Thursday, 5 February 2015

Butterfly Cupcakes Recipe


You see these cupcakes right here? Party food of my childhood. If these cakes were at a party I went to, I would be at the food table, just eating them. And it wasn't just me, everyone else loved these cakes too! Even now I can't work out what the appeal was. I mean sure, they are rather delicious, but what makes them so special? Is it simply just the fact that the cakes are super light and fluffy, lathered in cream and jam, with cute 'butterfly wings' sitting on the top? Or is there something more?

Either way, I can't give you a definitive answer, but what I can give you is the best recipe I have ever found for baking these little beauties. And, bonus? It's super simple, so it's a great recipe for kids, or people who haven't done much baking before.


Butterfly Cakes Recipe
Time Taken: 30 minutes
Makes: 24 cupcakes

Ingredients:

  • 240g softened butter
  • 290g caster sugar
  • 370g self raising flour
  • 250ml milk
  • 4 eggs
  • 1 cup thickened cream, whipped
  • raspberry jam
  • icing sugar (to sprinkle)
Method
Preheat oven to 180°C and line 24 muffin tin holes with paper cases. Beat the butter, sugar, flour, milk, and eggs together until the mixture is smooth and pale. Then, evenly divide the mixture into the muffin cases. Cook for 15-20 minutes.

After the cupcakes have finished baking and have cooled, cut a shallow round out of the tops. This can be done using a spoon to scoop it out. Then, cut each of the rounds in half. Spoon some whipped cream into each hole in the cupcakes, then place the cut out rounds of the top to make the butterfly wings. Place a small dollop of jam in between the wings. To finish, dust the cakes with icing sugar. 

These cakes are best eaten on the day they are made, but will keep fine for a couple of days.


Wednesday, 28 January 2015

Fandom Baking Day

My sister and I absolutely looove to bake, and a couple of days ago we came up with the idea of having a fandom-based baking day. A great deal of the day was actually just spent watching The Sarah Jane Adventures since so many of our recipes needed refrigeration time. Buut the day of hard work paid off in the end since we got such delicious goodies out of it!


Pictured above: I am frothing up the butterbeer with a milk frother to make it look appetising. 


Pictured above: The Dharma biscuits were actually easier to cut out and inscribe than I had thought they would be. The hardest part was peeling the mixture off the chopping board and onto the tray without breaking the fish tails!


Pictured above: We watched Sarah Jane Adventures while waiting for our food to cook and played a (non-alcoholic) drinking game with butter beer. (link here)


Pictured above: This was my first ever attempt at making the cake from the Portals games (which is probably my favourite game series of all time), and I am actually pretty impressed at how it turned out. Here is an image from the game for comparison. And yes, I used strawberries because I'm not a huge fan of cherries.


What we made (the ones with links are for recipes we used):
Alice in Wonderland Jam Tarts
Portals Cake (from Portals)
Dharma Initiative Fish Biscuits (from Lost)
Butterbeer (from Harry Potter)

I sincerely hope that this has inspired you to have your own fandom baking day because it really was a lot of fun, and it was so nice to spend a day with my sister before she had to go back to school!

Ps. Outfit post on what I wore this day coming soon!

Saturday, 24 January 2015

Brown Banana Bread Recipe


I think if there was just one food I could eat for the rest of my life, banana bread might just win. Ever since I was little, my mum and I have always made banana bread together, so it's a great recipe to get kids into cooking. Plus, it seems to get tastier every time you make it! Anyway, enough of the ramble and on with the recipe...


Brown Banana Bread
Time: 20 minutes +cooking time
Makes: two small loaves

Ingredients:
  • 150 grams of butter
  • 1 1/8 cups of sugar
  • 2 eggs
  • 3 mashed bananas (older bananas work better)
  • 1 1/2 cups of wholemeal flour
  • 1/3 cup of orange juice
  • 1 1/2 cups of plain flour
  • 1 1/2 teaspoons of baking powder
  • 1 1/2 teaspoons of baking soda

Method:
Step One. Cream the butter and sugar until light and fluffy. Then add the eggs and beat mixture again.

Step 2. Add the mashed bananas, wholemeal flour, and orange juice to the mixture. Stir until just combined.

Step 3. Sift in the plain flour, baking powder, and baking soda. Mix again until all ingredients are just combined.

Step 4. Pour the mixture into the bread tins and bake at 180 degrees celsius for about one hour.

The bread is best eaten fresh, but will keep for about a week.

Serving Tip: This banana bread tastes amazing either fresh or warmed up with salted caramel sauce or butter!


Saturday, 17 January 2015

Garlic & Avocado Pasta


This is a recipe I have been wanting to try for such a long time now, but my sister isn't a fan of avocado, so I have been waiting for several months now for her to be gone away on her music camp so that I could make this for the rest of the family.

I found the flavours in this dish subtle, but still delicious. This was nice since individually they (particularly the garlic) can be quite strong, but together they created a really tasty blend. It made a great side dish, and we had it with some beautifully done beef eye fillets.

The original recipe is from Savoury Simple and, I'll be honest with you, we couldn't find all the ingredients, so I had to adapt it slightly. So here you go, my recipe for garlic & avocado pasta.


Garlic & Avocado Pasta
Adapted from: Savoury Simple
Time Taken: about twenty minutes

Ingredients:
Pesto
  • 5-10 fresh mint leaves
  • a small bottle of garlic paste
  • 2 spring onions
  • finely grated romano cheese

Pasta
  • 400g of pasta
  • the pesto from above
  • 1 ripe avocado
  • 1/2 Cup of almond milk
  • 2 tablespoons of lemon juice
  • extra romano cheese to serve
  • water to cook the pasta in

Method:
Step 1. Put the water on the stove top to boil, then whiz together all the pesto ingredients in a blender until well combined.

Step 2. Once the water has boiled, put the pasta in and cook for around 12 minutes.

Step 3. While the pasta is cooking scrape the pesto into a small bowl. Add the avocado and lemon juice to the bowl and mash it all together.

Step 4. Drain the pasta after it has finished cooking then add in the almond milk and the pesto mix from the small bowl.

Step 5. Serve with some grated romano cheese sprinkled over the top.


Friday, 19 December 2014

Chicken & Veggie Kebabs

Life has been slow lately, I'm doing a summer class, and working, but nothing much else has been happening. The best thing I've done so far was being on the media team/camera crew for my Church's christmas service. Although I was the only female amongst 14 guys (which wasn't as bad as it sounds), I actually really enjoyed myself this year. Ahh life... it's almost more enjoyable when life is stressful, because at least you're not sitting around doing nothing hey?

Anyway - on with the actual post!

Once again charged with making dinner I decided to turn to something a little more simplistic, yet still a little fancy. Kebabs were clearly the answer! I'm not going to include a recipe since you could probably tell what's in them and how to make them from the looking at the pictures, but if anyone desperately wants it, let me know.


Tuesday, 9 December 2014

Little Christmas Trees Cakes Recipe


These little christmas trees were the first of the holiday baking I have done this year. The last time they were made in our household was when I was about 10 years old, so they were a real treat to make again. The recipe is pretty simple, the hardest part is cutting out the shapes at the end.  So definitely give it a try if you are into celebrating christmas!

Little Christmas Trees
Makes: 10 trees, 16 presents
Time: 30 minutes prep, 45 minutes cooking

Ingredients:
  • 275 grams of self raising flour
  • 225 grams of softened butter
  • 3 1/2 tablespoons of milk
  • 1 teaspoon of baking powder
  • 225 grams of caster sugar
  • 3 drops of vanilla essence
  • 3 drops of almond essence
  • 4 eggs
  • icing - I used the recipe listed for these cakes, but this didn't make nearly enough, so I would recommend using either pre-made icing, or make your favourite icing from scratch
  • food colouring (green & any other colours)
  • lollies for decorating
Method:
Step 1. Mix the flour, butter, milk, sugar, baking powder, vanilla essence & almond essence together.

Step 2. Beat the eggs in a separate bowl with a fork then add them to the flour mixture and mix well.

Step 3. Pour the mixture into a large rectangular tin lined with baking paper and cook at 180 celsius for about 45 minutes.

Step 4. Once your cake has cooled, split the icing into separate bowls (the number depends on how many colours you want). Mix in a few drops of food colouring into each bowl.

Step 5. Split the cake into two sections, similarly to the photos below. One section will be for the presents, and the other for the trees.

Step 6. Ice the separate sections and then cut according to the image below (they did it the other way around - cut, then iced, but I found it easier to swap these steps).


Step 7. Decorate with an assortment of lollies and serve.

These cakes are best eaten within about 2-3 days of making.

Enjoy!